In the hyper-competitive marketplace of short-term rentals, your photographs are your single most powerful tool. Are you losing potential bookings to nearby listings simply because their images appear brighter and more professional? It is a common frustration for hosts who know their property offers a fantastic experience but struggle to convey that value visually. This is precisely where mastering a few essential airbnb photography tips can fundamentally elevate your listing's performance and profitability.
This comprehensive guide is your blueprint for transforming your property marketing. We will equip you with 15 actionable techniques-from mastering your smartphone's camera to implementing professional staging principles that captivate guests. You will learn to create a portfolio of stunning, light-filled images that make your property look its absolute best and command the attention it deserves. Prepare to stand out from the competition, maximize your bookings, and achieve a significant return on your investment, starting with the perfect shot.
Key Takeaways
- Meticulous staging is the foundation of a successful photoshoot. Prepare your space to create a clean, inviting, and aspirational first impression that captivates guests.
- Master the core principles of composition and lighting to capture high-quality images with your smartphone, proving that professional results don't always require professional gear.
- Strategic photo editing elevates your images from good to great. Learn simple post-production techniques to ensure your photos are bright, sharp, and true-to-life.
- Applying these essential airbnb photography tips will clarify when to invest in a professional photographer to dramatically increase your booking potential and maximize revenue.
The Foundation: Staging Your Airbnb for a Picture-Perfect Shoot
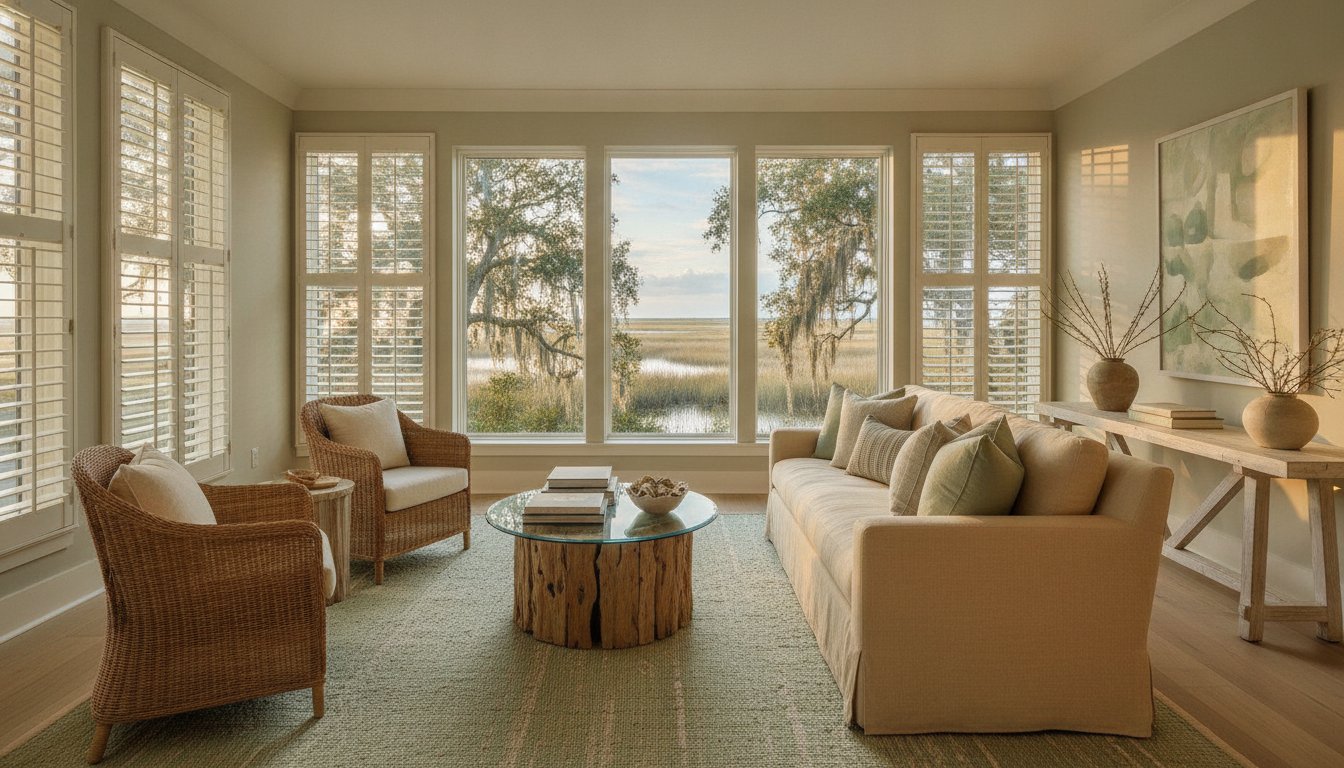
Before a single photo is taken, the most critical work begins. The difference between a listing that gets scrolled past and one that captivates potential guests lies in meticulous preparation. This is one of the most vital airbnb photography tips we can offer: success is 90% staging. Your goal is to create a space that feels less like someone's home and more like a pristine, aspirational getaway. These foundational airbnb photography tips are non-negotiable, whether you are shooting DIY or hiring a professional to elevate your listing.
Declutter and Depersonalize
Prospective guests need to envision their vacation, not yours. Remove all personal effects-family photos, refrigerator magnets, mail, and daily clutter. On kitchen and bathroom counters, less is more. Leave only a few tasteful, strategic items. Meticulously conceal all visible cables, cords, and remote controls for a clean, polished look. The objective is a minimalist yet welcoming canvas that invites guests to mentally move in.
Set the Scene: Staging for a Lifestyle
Transform your space from a simple room into a desirable experience. This means staging for the lifestyle you're selling. Make every bed with crisp, hotel-quality linens and perfectly plumped pillows. Set the dining table for an intimate meal for two. Small, intentional touches signal quality and care. Consider adding:
- A bowl of vibrant, fresh fruit on the kitchen counter.
- An interesting book on a nightstand or coffee table.
- A stack of fresh, fluffy white towels in the bathroom.
Mastering Natural Light
Exceptional photography is built on exceptional light. Plan your shoot for when your property receives the most sunlight, typically mid-morning or early afternoon. Open every curtain and blind to flood the space with natural light. Then, turn on all interior lights, including table lamps and under-cabinet lighting, to add warmth and depth. This layering of light is a core principle in professional architectural photography techniques and is crucial for creating bright, inviting images. Ensure all bulbs share the same color temperature (e.g., warm white) to avoid distracting color casts.
DIY Masterclass: Capturing Stunning Photos with Your Smartphone
While professional photography yields unparalleled results, the powerful cameras in modern smartphones are more than capable of producing high-quality images for your listing. The key to success isn't expensive gear; it's mastering the fundamental principles of lighting and composition. Before you begin, always wipe your camera lens with a microfiber cloth to remove smudges that degrade image quality. These foundational airbnb photography tips are about elevating your technique to ensure every photo is sharp, inviting, and consistent, creating a cohesive and captivating gallery for potential guests.
Essential Smartphone Camera Settings
Unlock your phone's potential by configuring these settings before your first shot. This simple setup ensures you capture the best possible raw image, giving you a superior foundation for any post-production editing.
- Turn on Gridlines: This feature is indispensable for aligning shots and adhering to composition rules like the Rule of Thirds.
- Use HDR Mode: High Dynamic Range (HDR) is crucial for property photos. It blends multiple exposures to balance the bright light from windows with the darker corners of a room, preventing blown-out highlights or deep shadows.
- Tap to Focus & Adjust Exposure: Always tap on the main subject of your photo to lock in focus. Then, slide your finger up or down to manually adjust the brightness for a perfectly exposed image.
- Avoid Digital Zoom: Never use the pinch-to-zoom feature. It severely degrades image quality by simply cropping the sensor image. Instead, physically move closer to your subject.
Composition 101: The Rules of Great Property Photos
How you frame a shot is just as important as the room itself. Strong composition guides the viewer's eye and makes spaces feel more appealing and spacious. Mastering these techniques is essential for creating better listing pictures that stand out from the competition and feel professional and polished.
- Shoot from a Corner: This vantage point captures more of the room in a single frame and creates a sense of depth, making the space appear larger.
- Maintain a Natural Perspective: Keep your phone at chest height (approximately 4-5 feet). Shooting too low or too high can distort the room's proportions.
- Keep Verticals Straight: Ensure all vertical lines (door frames, walls, windows) are perfectly straight. Tilting the camera up or down creates converging lines that look unprofessional. Use your gridlines to help.
Your Essential Airbnb Shot List
A strategic shot list ensures you capture every detail that will entice a guest to book. This is one of the most critical airbnb photography tips for a successful DIY shoot. Your goal is to tell a complete visual story of the experience you offer.
For inspiration on creating a compelling visual narrative, it can be helpful to study successful listings. To see how great photography attracts guests, you can explore Apartment Rentals and see how they combine wide shots, details, and amenity photos to market a space effectively.
Similarly, exploring travel blogs that excel in visual storytelling, like Tripaholics, can spark ideas for capturing the unique experience your property offers.
- Wide Shots: Capture 2-3 wide-angle shots of every primary room (living room, kitchen, bedrooms, bathrooms) from different corners.
- Detail Shots: Take 1-2 close-up shots in each room that highlight unique features or amenities, such as a high-end coffee maker, a welcome basket, or plush linens.
- Amenity Photos: Photograph every single amenity you offer. This includes the pool, hot tub, patio, BBQ grill, game room, or dedicated workspace.
- The Hero Image: Your first photo should be a bright, welcoming exterior shot of your property, ideally taken during the "golden hour" for soft, flattering light.

Photo Editing: Simple Steps for a Professional Polish
The final step in elevating your property photos from good to exceptional is a thoughtful editing process. The goal is not to alter reality but to enhance it, ensuring the digital image accurately reflects the welcoming ambiance of the real-world space. A few precise adjustments can transform a flat, dim photo into a bright, sharp, and captivating image that stops scrollers in their tracks. The key is to create a polished, true-to-life representation that builds trust and excitement in potential guests.
You don’t need expensive software to achieve professional results. Powerful, intuitive tools are likely already on your phone, or available through free apps like Snapseed and Adobe Lightroom Mobile. The most critical principle is consistency. Apply the same style of edits across your entire photo set to create a cohesive, high-end gallery that looks curated and professional.
The Four Key Edits for Every Photo
Mastering just a few fundamental adjustments will dramatically improve your images. Focus on these four controls to make your property look its absolute best:
- Brightness/Exposure: Gently increase this to create an inviting, airy feel. The aim is a bright space, not a washed-out one, so be careful not to lose detail in windows or light fixtures.
- Contrast: Add a subtle touch of contrast to give your image 'pop' and prevent it from looking flat or hazy. This makes the distinction between light and dark areas more defined.
- Shadows: One of the most impactful edits. Lifting the shadows slightly reveals important details hiding in darker corners of the room, making the space feel larger and more visible.
- Sharpness: Increase sharpness by a small amount to make textures and details-like wood grain or fabric weaves-appear crisp and clear, conveying a sense of quality.
Common Editing Mistakes to Avoid
Poor editing can do more harm than no editing at all. Overly processed photos look inauthentic and can damage a potential guest's trust before they even book. In fact, even Airbnb's official photography guide emphasizes the importance of a natural look. Avoid these common pitfalls:
- Oversaturation: Pushing colors too far makes your space look cartoonish and artificial. Aim for vibrant, but realistic, hues.
- Extreme HDR: Avoid the fake, glowing effect that screams amateur photography. It creates harsh halos around objects and looks unnatural.
- Crooked Lines: A tilted horizon or leaning walls are distracting. Use your editor’s straighten or perspective tool to ensure all vertical and horizontal lines are perfectly aligned.
- Over-sharpening: Too much sharpening creates a gritty, unpleasant texture and digital noise. The effect should be subtle and clean.
While these DIY airbnb photography tips can significantly elevate your listing, achieving a flawless, magazine-quality finish that captivates and converts often requires a professional touch. For expert results, visit houzpics.com to learn more.
When to Hire a Pro: Elevating Your Listing to a New Level
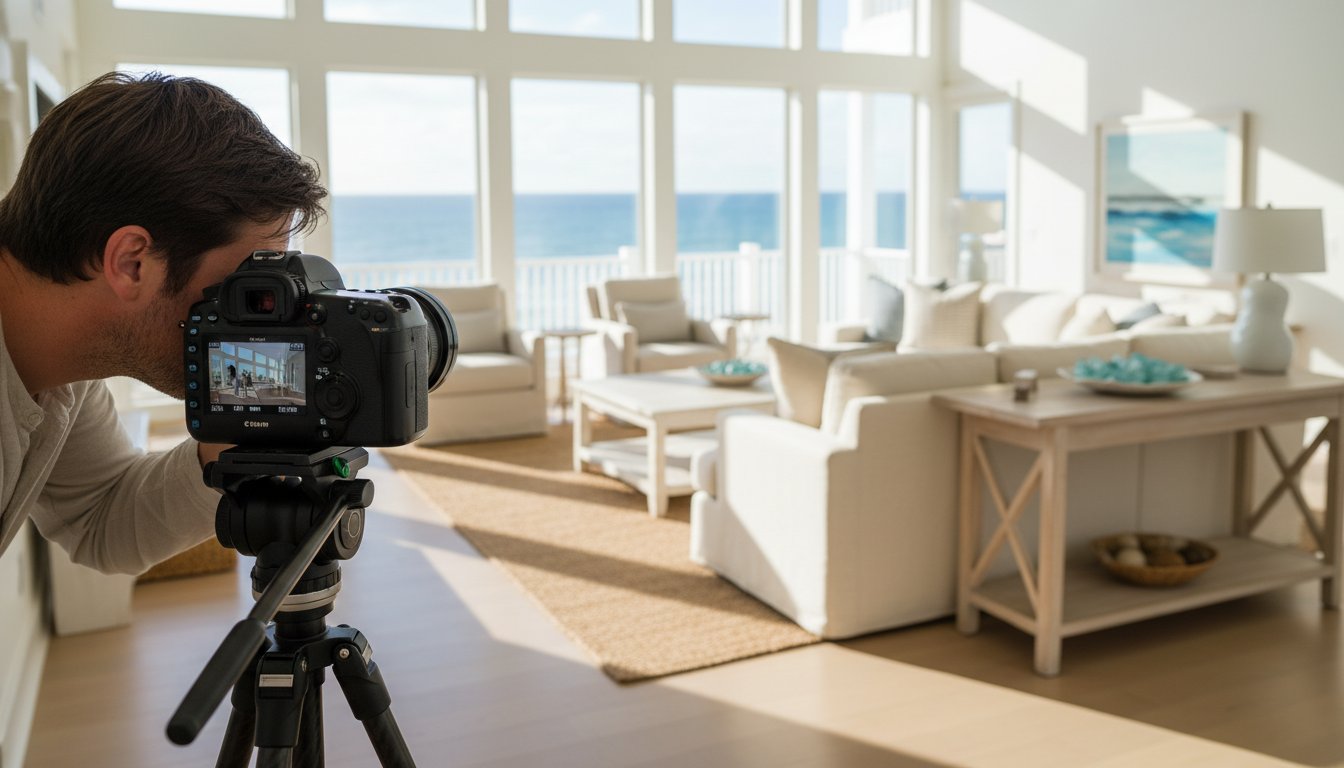
While the previous airbnb photography tips can dramatically improve your DIY shots, there comes a point where investing in a professional is the single most powerful step you can take to maximize your property's potential. Think of it not as an expense, but as a strategic investment in your business. Listings with professional photos don't just look better-they perform better, earning hosts up to 40% more revenue and booking 24% more nights.
A professional doesn’t just have a better camera; they have a trained eye for what sells. They leverage specialized equipment like wide-angle lenses to make spaces feel open and inviting, and use advanced off-camera lighting to create bright, balanced images that a smartphone simply cannot replicate. Their expertise in composition, styling, and post-production transforms your listing from amateur to aspirational.
The Tangible ROI of Professional Photography
The return on investment for professional photos is swift and significant. Premium imagery directly impacts your bottom line by delivering measurable results:
- Increased Click-Through Rate: Your cover photo is your first impression. A captivating, professional image stands out in crowded search results, earning more clicks and views.
- Higher Perceived Value: High-quality photos signal a high-quality stay, allowing you to justify a higher nightly rate and attract discerning guests.
- More Bookings: Stunning visuals build trust and create an emotional connection, converting hesitant viewers into confirmed guests. A professional photoshoot often pays for itself within just a few bookings.
What to Expect from a Professional Photoshoot
A professional brings technical mastery to every shot. They understand how to capture the best angles and use natural and artificial light to highlight your property’s best features. You can expect advanced editing techniques, such as window pulls to show both the interior and the exterior view perfectly. The result is a consistent, flawless gallery that tells a compelling story and sets your listing apart.
Finding the Right Photographer for Your Airbnb
When searching for a photographer, look for a specialist in real estate or architectural photography, as they understand how to shoot spaces effectively. Always review their portfolio to ensure their style aligns with your property’s unique vibe. Don't hesitate to ask about their process, typical turnaround time, and what usage rights are included with your images. Our experts at Houzpics know how to captivate guests and secure bookings.
From Clicks to Bookings: Master Your Airbnb Photography
Mastering your Airbnb's visual story is the key to standing out in a crowded market. Whether you're meticulously staging your space for the perfect shot or applying a final professional polish through editing, high-quality images are non-negotiable. By implementing these actionable airbnb photography tips, you create a powerful first impression that directly translates into more bookings and higher revenue, establishing the foundation for a successful rental business.
While DIY efforts can significantly improve your listing, achieving that next level of success requires an expert eye. Our award-winning creative team at Houzpics brings over 30 years of property marketing experience to every shoot. Trusted by top agents and builders in Hilton Head, we know how to captivate potential guests and elevate your property's appeal. Ready to elevate your listing and maximize your income? Book your professional photoshoot with Houzpics.
Your property has a unique story to tell. Let's make sure every potential guest sees it in the best possible light.
Frequently Asked Questions About Airbnb Photography
How many photos should I have on my Airbnb listing?
We recommend a comprehensive gallery of 25-40 high-quality photos. This allows you to tell a complete visual story of your property. Aim for 2-3 captivating shots of each key space-living room, kitchen, bedrooms, and bathrooms-plus detailed images of unique amenities, the exterior, and the surrounding neighborhood. A robust photo set gives potential guests the confidence to book, knowing exactly what to expect from their stay and leaving no questions unanswered.
Should I shoot my Airbnb photos horizontally or vertically?
Always shoot in landscape (horizontal) format. This orientation best fits the Airbnb platform's display, mimics the natural human field of vision, and effectively captures the breadth of a room. Vertical photos can feel cramped and are often cropped awkwardly on desktop browsers, diminishing their impact. While a vertical shot might work for a specific detail, your primary gallery should be exclusively horizontal to create a professional, immersive viewing experience for potential guests.
Is a professional video tour worth it for an Airbnb?
Absolutely. A professionally produced video tour is a powerful tool that elevates your listing above the competition. While photos showcase moments, a video tells a story, guiding guests through the property to reveal its flow, scale, and unique ambiance. This immersive experience builds a deeper connection and level of trust with potential bookers, often shortening their decision-making process and leading to a higher conversion rate. It is an investment in securing more bookings.
What is the best time of day to take photos of my property?
The optimal time is when your property is filled with bright, indirect natural light. For most interiors, this is typically mid-morning or mid-afternoon, avoiding the harsh shadows of direct midday sun. For exterior shots, the "golden hours"-the first hour after sunrise and the last hour before sunset-provide a warm, flattering light that adds ambience and drama. Always schedule your shoot based on when each specific room looks its absolute best.
How can I take good photos of a small or dark room?
To master a small or dark space, leverage light and perspective. Turn on every light source and open all blinds to maximize brightness. Shooting from a corner or doorway with a wide-angle lens (16-24mm) can create a sense of openness without distorting the view. Using a tripod is one of the most crucial airbnb photography tips for dark rooms, as it allows for a longer exposure to capture more light, resulting in a bright, crisp, and inviting image.
What are the most common photo mistakes Airbnb hosts make?
The most frequent errors we see are poor lighting, excessive clutter, and using vertical phone photos. Dark, blurry, or yellow-tinted images fail to captivate and can make a space look uninviting. Similarly, personal clutter distracts from the property’s features. Another critical mistake is not providing a comprehensive gallery that showcases every room and unique amenity, leaving potential guests with unanswered questions and uncertainty. These are pitfalls that professional guidance can help you avoid.